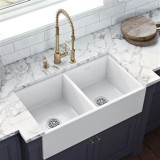
How to Put a Farmhouse Sink In
Farmhouse sinks, also known as apron sinks, have become increasingly popular in recent years due to their rustic charm and functionality. They are characterized by their large, single-bowl design and apron front that extends over the cabinet edge. While farmhouse sinks may seem intimidating to install, with proper preparation and planning, it is a project that can be completed by most do-it-yourselfers.
Tools and Materials Required
Before you begin, gather the following tools and materials:
- Farmhouse sink
- Sink base cabinet
- Plywood or MDF backer board
- Caulk gun
- Kitchen and bath caulk
- Level
- Screwdriver
- Drill
- Jigsaw or circular saw
- Clamps
- Tape measure
- Pencil
Step 1: Prepare the Cabinet
Start by ensuring that your sink base cabinet is level and sturdy. Remove the existing countertop and drawers if present. Measure the interior width and depth of the cabinet and transfer these measurements to the plywood backer board. Use a jigsaw or circular saw to cut the backer board to size.
Step 2: Install the Backer Board
Place the backer board inside the cabinet and center it. Secure it to the cabinet using screws. The backer board will provide additional support for the sink and help distribute its weight.
Step 3: Position the Sink
Carefully lift the farmhouse sink into place on top of the backer board. Center the sink in the cabinet and ensure that the apron front overhangs the cabinet edge evenly on both sides.
Step 4: Secure the Sink
Use clamps to hold the sink in place while you attach it to the backer board. Drill pilot holes through the sink flange and into the backer board. Insert screws and tighten them securely.
Step 5: Caulk the Sink
Run a bead of kitchen and bath caulk around the perimeter of the sink where it meets the countertop and the cabinet. Smooth the caulk using your finger or a caulk tool. Allow the caulk to fully cure.
Step 6: Connect the Plumbing
Connect the sink drain and supply lines according to the manufacturer's instructions. Ensure all connections are tight and free of leaks.
Step 7: Install the Countertop
Replace the countertop and secure it to the cabinet. Ensure that the countertop is level and overhangs the sink apron slightly.
Additional Tips
Here are some additional tips for a successful farmhouse sink installation:
- Use a heavy-duty sink base cabinet that can support the weight of the sink and water.
- Test the sink for leaks before installing the countertop.
- Choose a farmhouse sink with a reversible apron front to accommodate different cabinet styles.
- If you encounter any difficulties during the installation process, consult with a qualified plumber or carpenter.

How To Install A Farmhouse Sink Diy Kitchen Remodel

Farmhouse Sink Installation Easy Diy Top Mount Do Dodson Designs

How To Install A Farmhouse Sink

Farmhouse Sink Installation Easy Diy Top Mount Do Dodson Designs

How To Install A Farmhouse Sink Diy Kitchen Remodel

Kitchen Progress Installing The Farmhouse Sink Sarah Joy

Diy Farmhouse Sink Install Undermount Zuhne Stainless Steel
How To Choose The Right Farmhouse Sink For Your Kitchen Signature Hardware

How To Add An Apron Front Sink Existing Granite Counters Your Home Renewed

Farmhouse Sink Installation Easy Diy Top Mount Do Dodson Designs


