How to Build a Jewelry Armoire: A Comprehensive Guide
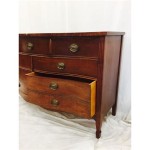
A jewelry armoire is not just a storage solution; it is a reflection of your style and taste. Whether you prefer classic or contemporary designs, there are countless options to create a custom armoire that perfectly complements your décor and keeps your precious pieces organized and protected.
Building a jewelry armoire from scratch may seem like a daunting task, but with the right materials, tools, and a bit of patience, you can create a stunning and functional piece that will be cherished for years to come. Here's a comprehensive guide to help you get started:
Materials:
- Wood (hardwood or softwood)
- Plywood or MDF
- Fabric (for lining the drawers and compartments)
- Hardware (hinges, drawer slides, knobs, handles)
- Wood glue
- Wood filler
- Sandpaper
- Stain or paint (optional)
- Clear varnish
Tools:
- Saw
- Drill
- Screwdriver
- Hammer
- Clamps
- Sanding block or orbital sander
- Measuring tape
- Level
Step-by-Step Instructions:
1. Design and Planning:
Determine the size, shape, and design of the armoire based on your needs and available space. Sketch a plan that includes the dimensions of each component and the arrangement of the compartments, drawers, and shelves.
2. Cutting the Wood:
Cut the wood pieces according to the plan using a saw. Ensure all cuts are precise and straight. Sand the edges of the pieces to smooth any rough surfaces.
3. Assembling the Frame:
Assemble the frame of the armoire using wood glue and clamps. Reinforce the joints with screws or nails. Make sure the frame is square and level.
4. Installing the Back and Sides:
Cut the plywood or MDF to size for the back and sides of the armoire. Attach them to the frame using wood glue and clamps. Countersink the screws or nails to create a flush surface.
5. Building the Drawers and Shelves:
Construct the drawers and shelves using the same techniques as the frame. Install the drawer slides and line the drawers and shelves with fabric to protect your jewelry from scratches.
6. Adding Hardware:
Attach the hinges to the doors and the drawer slides to the drawer boxes. Install knobs or handles for ease of use.
7. Finishing:
Sand the entire armoire to smooth the surface. Apply stain or paint if desired, then finish with a clear varnish to protect the armoire and enhance its appearance.
Tips for Designing Your Armoire:
- Consider the types of jewelry you have and design compartments and drawers accordingly.
- Add dividers and compartments to keep jewelry separated and organized.
- Incorporate a mirror to allow you to try on jewelry before wearing it.
- Choose a design that complements your bedroom or dressing area décor.
- Don't be afraid to experiment with different materials, finishes, and hardware to create a unique and personalized armoire.
Building a jewelry armoire is a rewarding project that can enhance both the functionality and aesthetic appeal of your space. By following these steps, you can create a custom armoire that will safely store your precious jewelry and become a cherished piece in your home for years to come.

Jewelry Cabinet Her Tool Belt

Jewelry Cabinet Her Tool Belt

Tim S Jewelry Armoire The Wood Whisperer

Tim S Jewelry Armoire The Wood Whisperer

Jewelry Cabinet Her Tool Belt

Jewelry Cabinet Her Tool Belt

Diy Jewelry Organizer Shanty 2 Chic

Jamie And I Make A Jewelry Organizer Cabinet Jays Custom Creations

The Ultimate Diy Rustic Jewelry Cabinet Attractive With Lots Of Storage

Diy Inset Jewelry Cabinet Part 1 Infarrantly Creative


